The tiny bit of Linux and SSH you actually need

By Raviteja KNTSUpdated July 9, 2026
You'll connect to your server over SSH and control it by typing commands into a terminal. That's why Linux commands and SSH basics are worth learning: not to become a pro, but because knowing your way around pays off every time you install, fix, or update something. This lesson covers the small set you'll actually use.
Getting onto the server
Your server won't have a monitor plugged in. You drive it from your own computer over SSH, which is just a secure way to type commands on another machine. Start by opening a terminal on your computer: Terminal on Mac and Linux, PowerShell or Windows Terminal on Windows. Then connect using your server username and the IP address you pinned down in the install lesson:
ssh yourname@192.168.1.50Two first-time moments are worth knowing about so they don't throw you. The server will ask you to confirm its fingerprint, and typing yes is the right answer; it's the two machines introducing themselves, and it only happens once. Then it asks for your password, and the terminal shows nothing while you type, not even dots. That's normal. Type it blind and press enter.
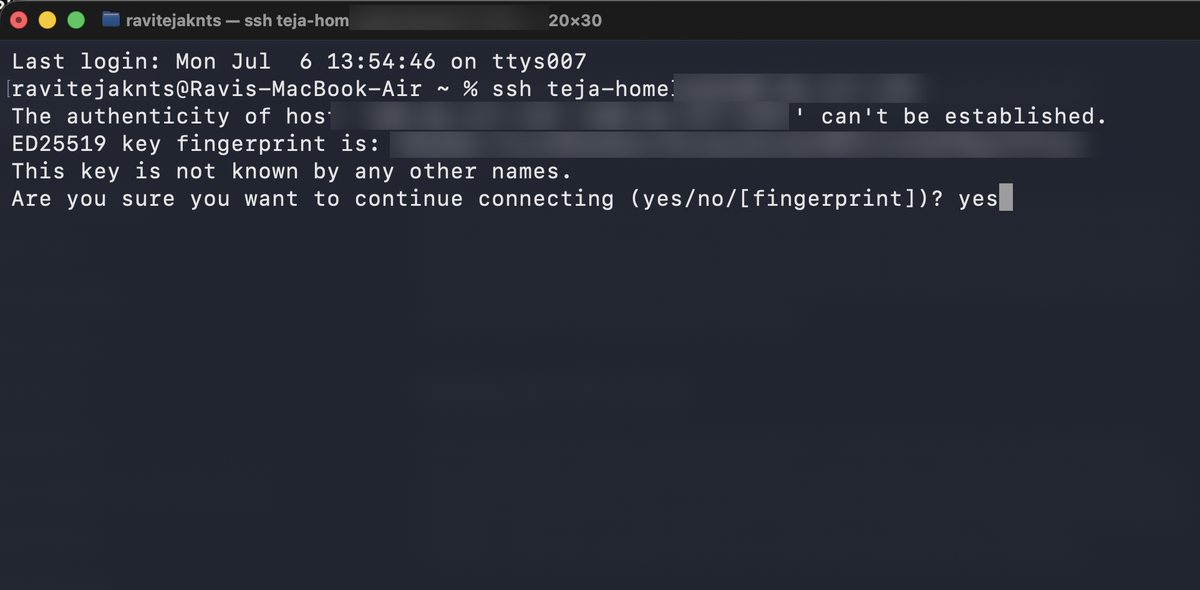
Once you're in, the prompt changes to show the server's name, and that's your cue that everything you type now runs on the server, not your laptop. Forgetting which machine you're on is the classic beginner slip, so glance at the prompt when in doubt.
Skip the password with a key
Typing a password on every connection gets old fast, and an SSH key is both quicker and more secure. It takes two commands, run on your own computer, not the server. First, generate the key pair:
ssh-keygenPress enter through every question it asks; the defaults are fine. Then hand your public key to the server:
ssh-copy-id yourname@192.168.1.50It asks for your server password one last time, and from then on ssh yourname@192.168.1.50 logs you straight in. Windows doesn't ship ssh-copy-id, so there PowerShell does the same job in one line, using whatever .pub filename ssh-keygen just printed:
type $env:USERPROFILE\.ssh\id_ed25519.pub | ssh yourname@192.168.1.50 "cat >> ~/.ssh/authorized_keys"Looking around
The whole system is just folders inside folders, and a small set of commands covers everyday life in there:
pwd                  # print where you are right now
ls                   # list what's in this folder
ls -la               # list everything, including hidden files
cd apps              # go into the "apps" folder
cd ..                # go back up one folder
cd ~                 # jump to your home folder from anywhere
mkdir backups        # create a folder
cp file.txt copy.txt # copy a file
mv old.txt new.txt   # move or rename a file
rm file.txt          # delete a file (no recycle bin)
cat file.txt         # print a file's contents
The one idea worth getting straight is a path: the address of a folder or file. Paths starting with / are absolute, they spell out the location from the very top of the system, like /home/yourname/apps. Paths without it are relative, they start from wherever you're standing: if you're in /home/yourname, then cd apps takes you to the same place. The ~ is a shortcut that always means your home folder. Half of all "no such file or directory" head-scratching is just an absolute path where a relative one was meant, or the other way around.
Keeping it updated
On Ubuntu or Debian, two commands refresh the list of available updates and then install them:
sudo apt update
sudo apt upgrade
sudo means "do this as the administrator," so it'll ask for your password. Running these every so often is basically the entire routine maintenance a small server needs. But that little word deserves respect.
Editing a file
Every so often you'll need to tweak a config file. nano is the friendly editor. (The file in this example, docker-compose.yml, is one you'll meet properly in a couple of lessons.)
nano docker-compose.ymlArrow keys move the cursor, you type like normal, Ctrl+O then Enter saves, and Ctrl+X gets you out. Editors like VS Code and Zed can also edit files on the server remotely, which is lovely once you're editing a lot, but the setup is overkill for homelab needs. nano covers everything this course does.
One habit ties all of this together: a lot of self-hosting is pasting commands from a project's official install page, and the skill is doing it carefully. Read what a command does before you run it, change the parts meant for you like a folder or a password, and paste one block at a time so you can see it worked before moving on.
Before you can install anything, though, you need the one tool every app runs on. Let's meet Docker and get it installed.